Evaluating the Endless Embroidery Border Design
Let me be direct. When I look at a new embroidery design, I’m not just looking at a pretty image on screen. I’m mentally stitching it out on fabric, thinking about how it will behave under the needle, and imagining it on a finished product in my shop or on a client’s gift. My evaluation of the Endless Embroidery Border Design comes from that exact, practical perspective.
The First Impression: Elegance with a Practical Twist
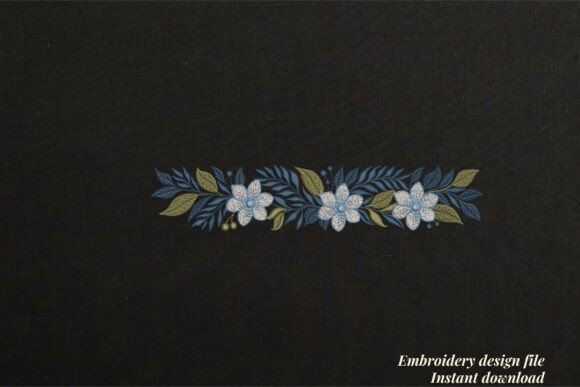
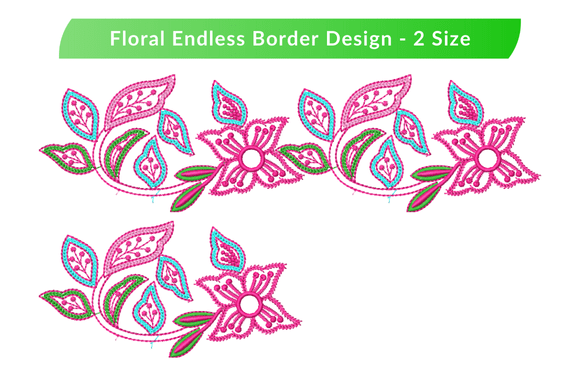
The initial mood this design sets is one of flowing, organic elegance. It’s a Floral Endless Border, so the theme is clear, but the layout is its real strength. The intricate swirl pattern creates movement. It feels sophisticated but not overly formal. The detail level is balanced—there’s visual interest without being so dense it would become a stitching nightmare. This visual personality makes it versatile; it naturally belongs to projects that need a touch of refined decoration, not a loud statement.
Where This Border Design Truly Excels in Real Projects
Here’s a scenario: I’m preparing a custom embroidered linen tea towel for a boutique client. A plain towel feels unfinished; a large central motif might be too bold. This Endless Embroidery Border Design, with its two different sizes, is the perfect solution. The smaller size could frame the edge neatly, adding value without overwhelming the fabric. The larger version could make a stunning border on a tote bag, transforming a simple bag into a handmade product with clear artistry.
In real-life embroidery project situations, its application is broad. For custom apparel like the hem of a sweatshirt or the cuff of a t-shirt, it adds a boutique feel. On a baby clothes item, like a blanket edge, it provides a gentle, decorative touch perfect for personalized gifts. For small business merchandise, such as an apron or a pillow cover, it elevates the basic item, making it more giftable and increasing perceived value. As an Etsy seller, using this on a series of products—table linens, caps, patches—creates a cohesive brand consistency. It’s also excellent for digital product previews and printable mockups to show potential customers how their embroidered patch or tote bag design could look.
Visual Impact and Customer Perception
How a design stitches out directly affects customer trust and engagement. This border, with its clear swirls and floral elements, promises good stitching clarity. When stitched with quality thread on proper stabilizer, the finished product looks professional. That handmade presentation shifts from “homemade” to “artisan-made,” which is crucial for creative entrepreneurs. A buyer seeing this on a holiday gift or wedding gift item recognizes the care put into it. For commercial embroidery projects, this professionalism is non-negotiable.
The Practical Considerations: Where to Use with Care
No design is perfect for everything, and a thoughtful designer knows its limits. The Endless Embroidery Border Design should be used carefully on very small hoop sizes where its intricate details might get lost or become too dense. On highly textured fabrics or thin, stretchy fabric, the stitch density needs to be matched with the right stabilizer to prevent puckering. On dark fabric backgrounds, thread color contrast is paramount—test it first.
Applying it to curved surfaces like caps requires planning for the endless nature of the pattern; you might need to adapt the start and end points. For products that need frequent washing, like kitchen towels, ensuring the fill stitch areas are secure and not too delicate is key. And while it’s beautiful for baby embroidery or nursery decor, I’d avoid using it on areas with tiny lettering or other dense accents, as it could create a visually cluttered final product.
Notes from the Hoop: A Designer’s Checklist
Before I commit this embroidery file to a client’s project or my own craft business inventory, here’s my practical process:
- Always, always test the design on scrap fabric first. Use the same material and stabilizer as the final project.
- Check thread color contrast by stitching a snippet on both light and dark fabric backgrounds. How do the swirls read?
- Review the stitch density in the provided files. Does it feel appropriate for the intended fabric weight?
- Confirm the required hoop size for each of the two sizes. The product description mentions two sizes, but I need to check the actual dimensions in the files.
- Inspect the small details in a stitched sample. Are any areas too fine for clean satin stitch or running stitch?
- Test the design in black and white mockups to judge its form without color distraction.
- Use proper stabilizer. This isn’t a generic tip; for a border, which often runs along edges, stabilization is critical for clean lines.
- Most importantly, check whether the design works for both personal and commercial projects. The product description doesn’t specify license terms, so I must confirm the licensing before selling finished items or using it as part of my digital embroidery file assets for sale.
The Final Stitch: A Border That Adds Real Value
From my point of view, the Endless Embroidery Border Design isn’t just another digital asset. It’s a tool that, when applied thoughtfully, can enhance a wide range of projects from personalized gifts to small shop products. Its elegance increases visual appeal, its practical two-size offering gives flexibility, and its finished look boosts product value. For makers and apparel decorators, it’s a reliable choice for adding a professional border. But the real judgment comes from the hoop. So my advice is to load the file, stitch it out, and see how it performs on your specific fabric for your specific project. That’s where you’ll know if this endless border truly fits your endless creativity.